
The behind-the-scenes of creating my cookbook ‘Effortless Asian Cooking: 30-Minute Recipes for Flavorful Noodles, Rice Bowls, Stir-Fries, Curries and More’. From proposal rejections to recipe development and the organising tools I use to keep me sane, here’s your inside look at the process!

Hey friends! As you know, I recently announced the pre-order launch of my new cookbook: Effortless Asian Cooking: 30-Minute Recipes for Flavorful Noodles, Rice Bowls, Stir-Fries, Curries and More. In this post, I thought I wanted to take you behind the scenes of my cookbook creation process to share the ins and outs of producing a cookbook.
I wanted to do this while on the cookbook journey (instead of after), but I grossly underestimated how much time and effort I would pour into the cookbook. Buckle up, because it’s been quite the ride!
I had NO IDEA how much work goes into creating a cookbook! If you have a cookbook somewhere right now, pick it up and give it a giant hug. That’s one hunk of labor of love.
If you’re also looking to publish a cookbook, I hope this post gives you some inspiration and practical tips to get you started on your cookbook journey – I refuse to gatekeep!
Table of Contents
How It Started (proposal and pitching)
Let’s rewind to the beginning.
It all started when Editor Emily from Pagestreet Publishing stumbled upon my Instagram feed and, I don’t know, saw something special.
A few emails and video calls later to make sure we’re on the same page, and we got to work on the cookbook proposal and pitching! She believed in me enough to pitch my cookbook idea, and I will FOREVER be thankful for that!
However, the road to finding the right concept was rocky.
My initial proposal for quick and easy Malay/Malaysian recipes was rejected. “It’s too niche”, otherwise translated to “it won’t sell.”
I’ll be honest, it wasn’t fun to hear the food that you grew up with is ‘too niche’ – and as much as I know that it’s not true, I couldn’t help but take that as: ‘the food of my culture is not good enough.’ Ugh, I know, I know.
I shook myself off, brainstormed with Emily a bit more, and landed next on Southeast Asian recipes—a territory I also know and love. That idea was rejected faster than you can say Tom Yum Goong, because the company is already representing Southeast Asian cookbooks.
But hey, third time’s the charm, right?
“Hmmm, what about Asian cooking? I make a lot of Korean, Japanese, Indian, Chinese food too.”
“If you can make them in 30 minutes or less, we’re in!”
And that’s a quick story of how we landed on ‘Effortless Asian Cooking: 30-Minute Recipes for Flavorful Noodles, Rice Bowls, Stir-Fries, Curries and More’!
And just like that, my cookbook journey officially began!
How to Plan and Outline a Cookbook
Step 1: Defining the Cookbook Concept
From developing a theme for the cookbook to curating a list of must-have recipes, the planning stage sets the foundation for everything to come! In this section, I broke down the planning stage of creating Effortless Asian Cooking.
The first step is to defining your cookbook concept is to choose your niche and develop a cookbook theme. Identify your unique cooking style or specialty, i.e. why do people love your recipes?
For Effortless Asian Cooking, the concept was set at the earlier pitching stage: 30-minute Asian recipes.
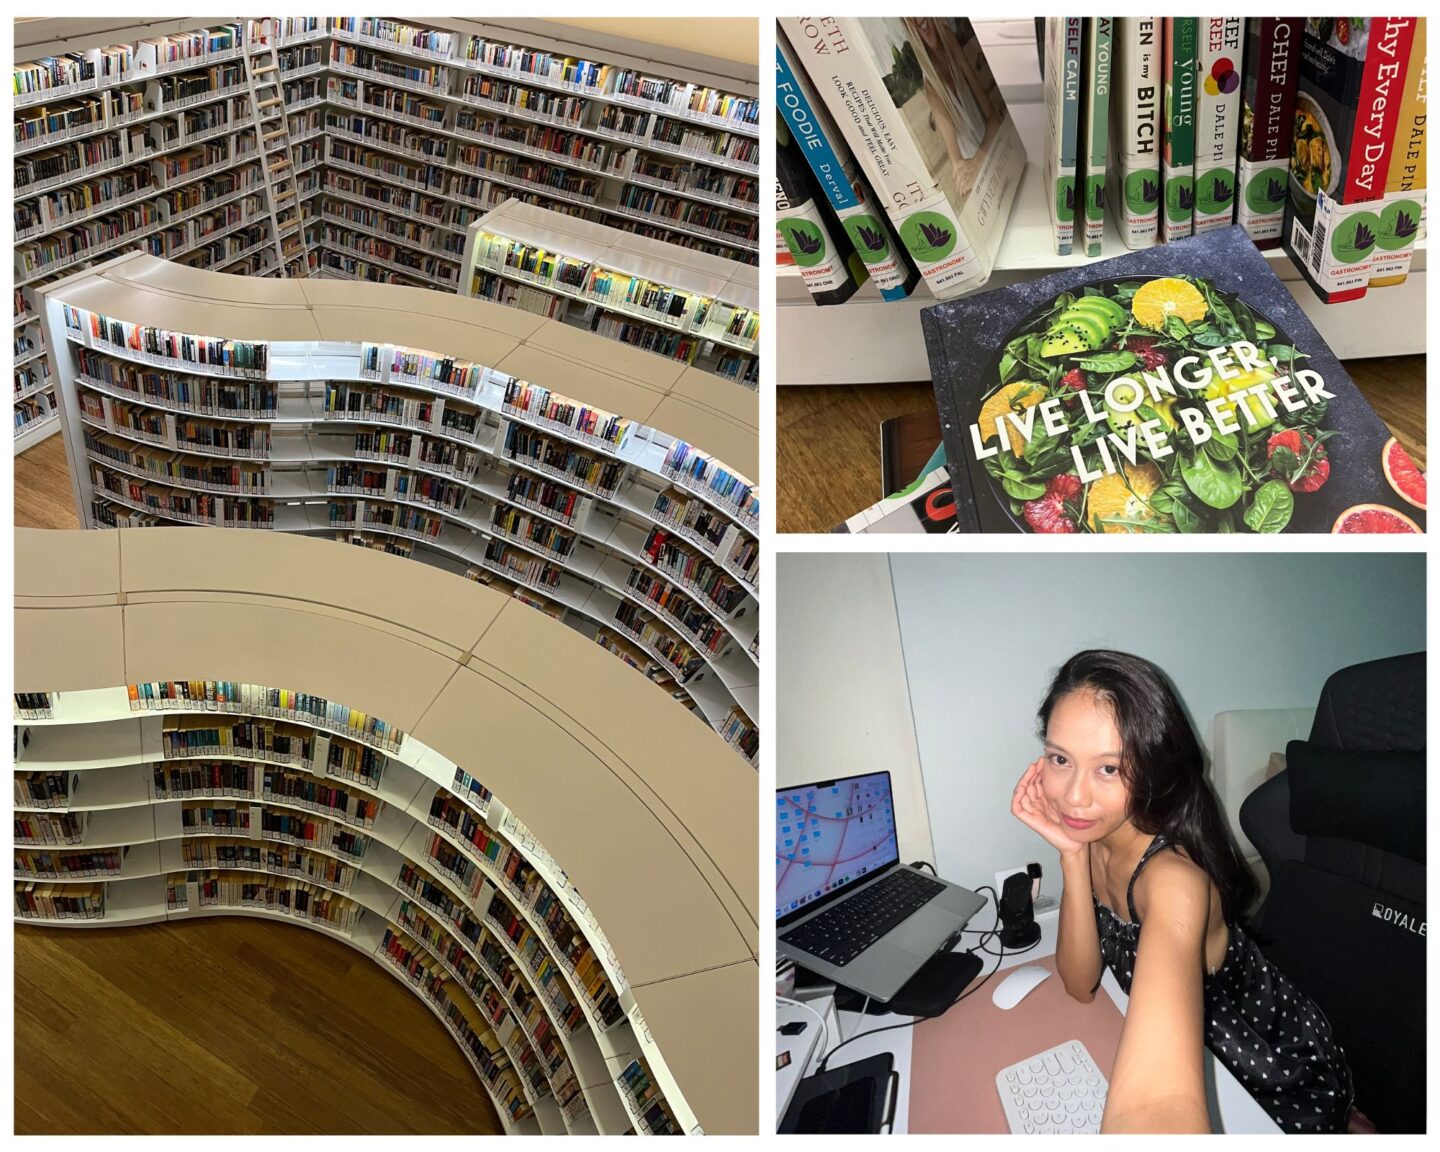
I spent countless hours in my local library (can we quickly talk about how uncomfortable libraries are for actual working? It’s SO COLD!), perusing cookbook after cookbook, taking notes of what I loved about them, as well as what I didn’t like so much.
Step 2: Defining the Target Audience
The next step is to determine the target audience by answering this simple but crucial question:
WHO is this cookbook for?
This one question answers a few more important questions that will set the tone of the cookbook:
- Who are you writing for? Beginner cooks, food enthusiasts, or specific dietary communities?
- Knowing your audience will make much easier to shape the content and tone of the cookbook.
This should be quite simple, especially if you have a blog or social media account with a decent following. Mine would be people who love practical, quick and easy Asian recipes – you! Hello!
Once the target audience is determined, flesh it out in a person – this is the avatar. For example, my avatar is Sarah, a full-time working Mom who loves Asian food and needs to feed a picky family. She needs variety, practical recipes
This step will be the North Star of the rest of the decision-making in the book! Once the avatar (the person this cookbook is for) is worked out, every other decision will hinge on “will the avatar appreciate this?”
Step 3. Determining the Structure
The next important step is the initial stage of outlining the book. We worked backwards for this, by listing out all of the recipes I wanted to be featured in the cookbook. From there, we did the first draft of outline.
These are some of the considerations:
1. What is the overall format of the cookbook? Is it recipe-driven, narrative-driven, or both?
2. How to organize the chapters? By ingredients, cuisine, course?
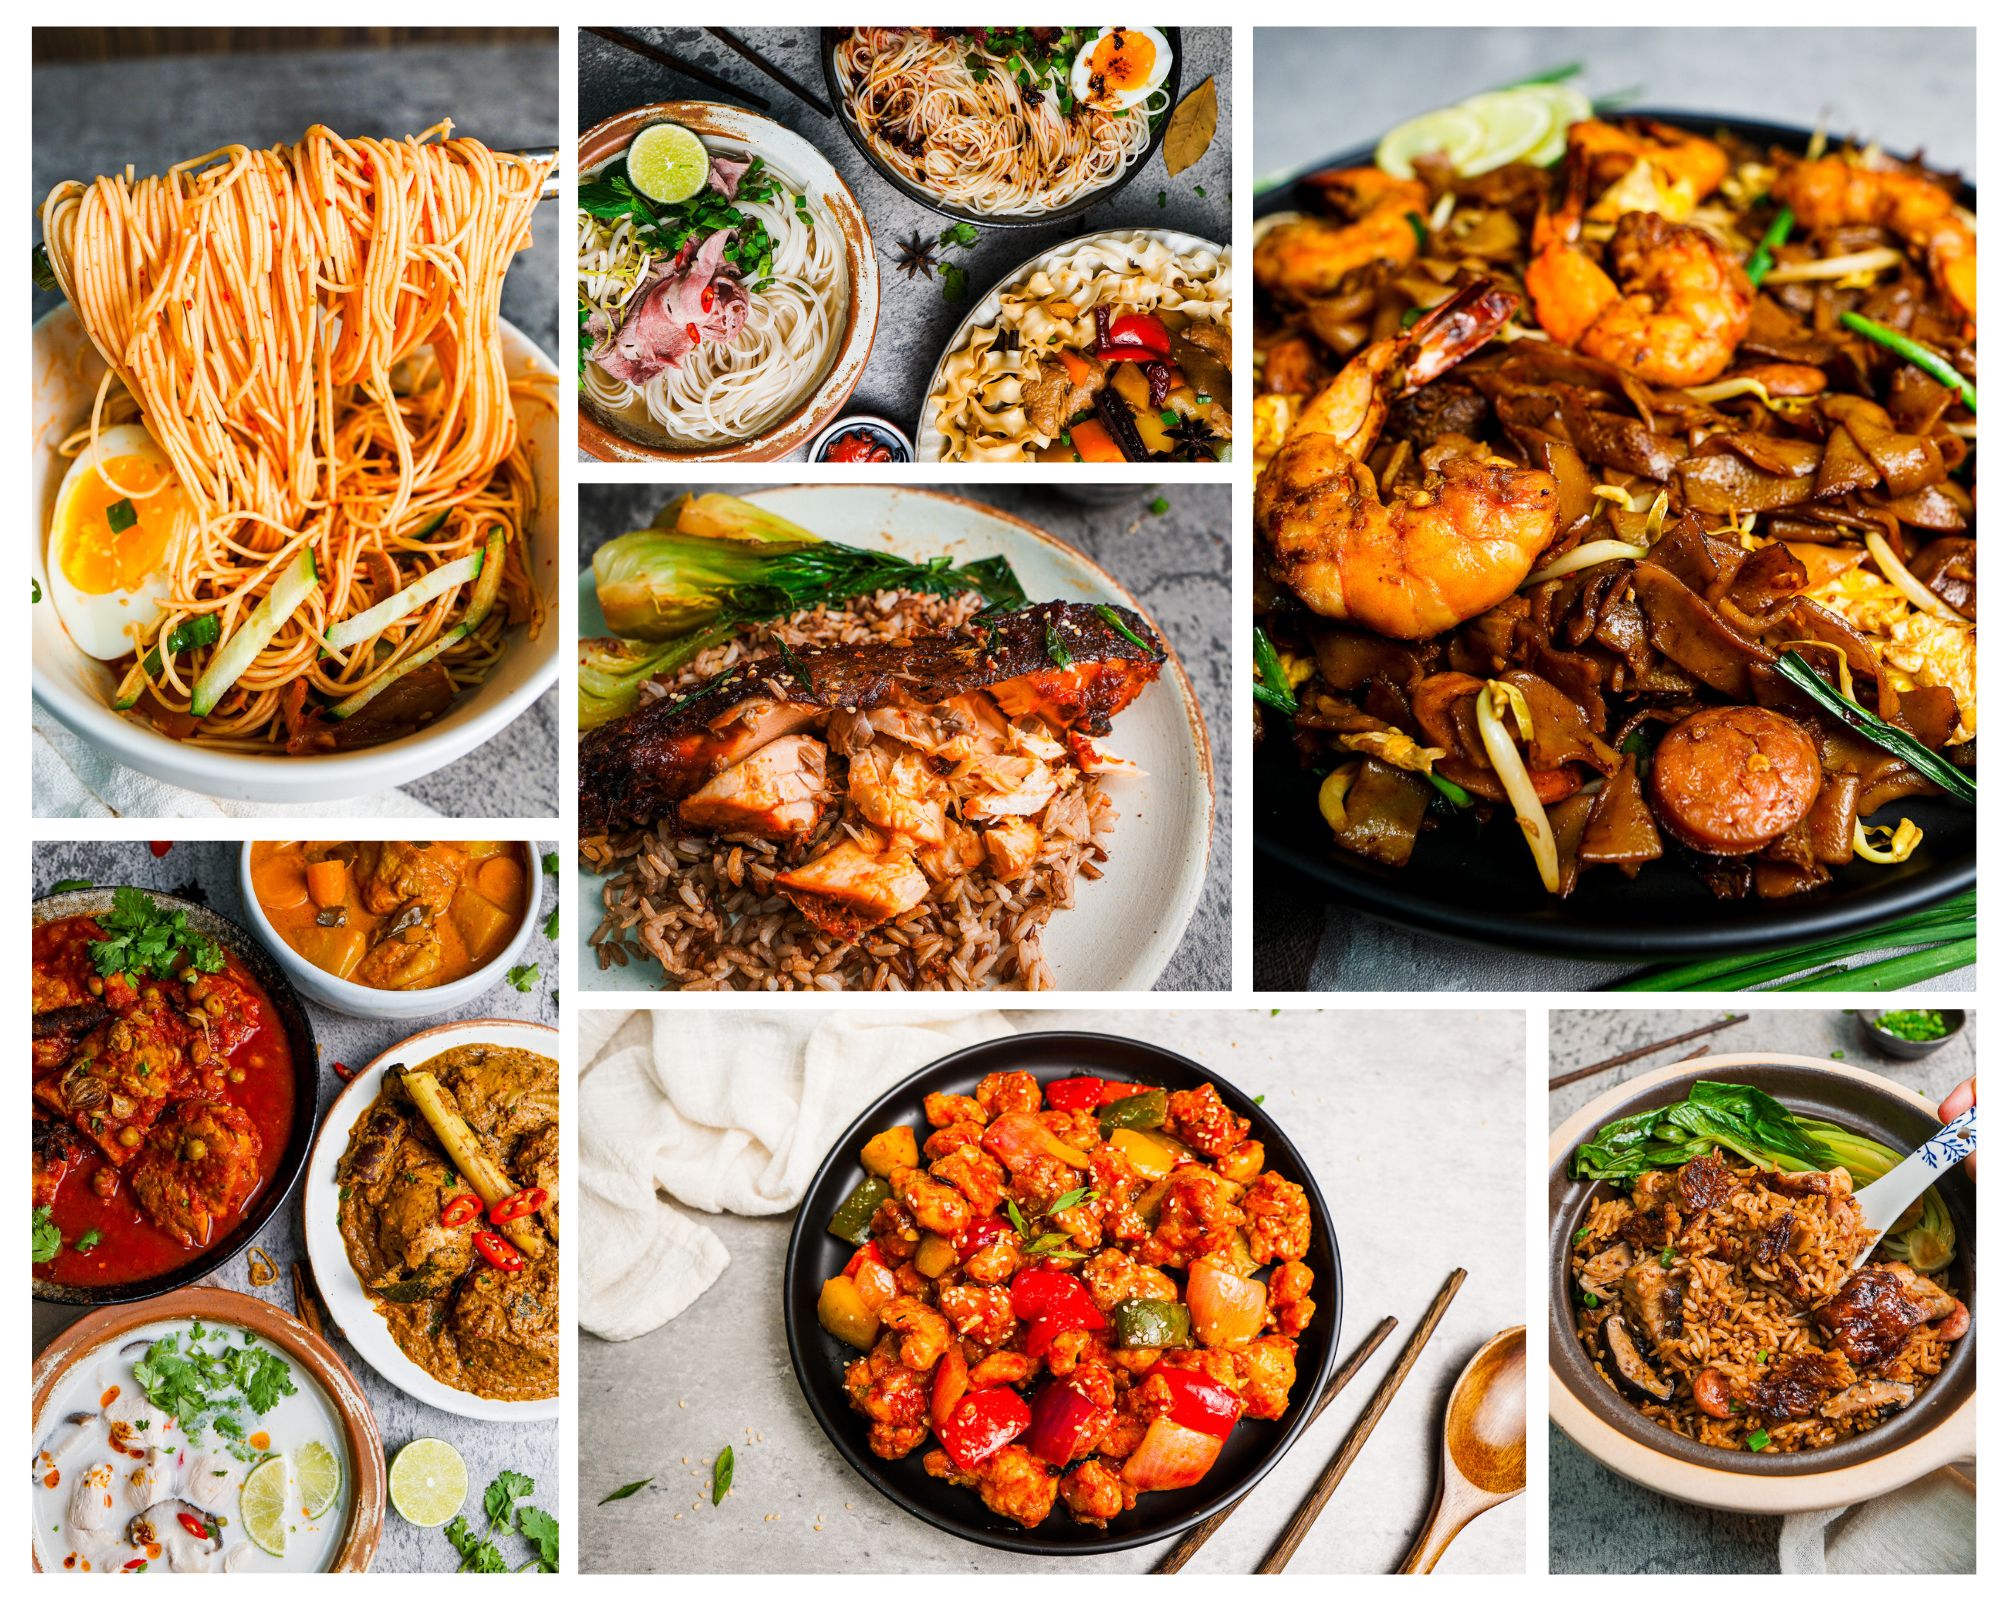
I knew that the biggest chapter had to be on noodles! Quick, easy, one-pot/one-pan noodles are one of my favorite dishes to have throughout the week in a pinch, so I knew your weekday quick meals had to involve noodles at some point.
There’s also a huge chapter on rice, featuring quick and easy one-pot dishes. Is it even a respectable Asian cookbook if rice is not the main serving dish? Which is why the remaining chapters include dishes meant to be served with rice. Expect to find dishes featuring chicken and eggs, beef, seafood, vegetables, and even a special section on curries, soups, and stews. Comforting curry in 30 minutes? YES!
3. Is the flow logical? Decide on the importance of the order in which chapters appear, and ensure each chapter builds on the previous one.
Step 4. Shortlisting the Recipes
To fill in the outline, comes shortlisting the actual recipes! Initially, the cookbook was to contain just 60 recipes. If that sounds like a lot to you, it’s FAR from it! Shortlisting was HARD. With all the recipes in my repertoire, it was torture trying to dwindle it down to just 60.
There were plenty of questions I had to answer too: “Is this too common a recipe? Should all the recipes be new? How big should each category be? What recipes would people appreciate? How much variety does the cookbook really need?”
These are just SOME of the considerations in planning the book.
One of the major questions I had was:
“Should all the recipes be new? Why would anyone want to buy a cookbook with a recipe that I’ve already given out for free on this blog?”
The publishing team assured me that this wasn’t an issue! It’s a totally different experience altogether having a cookbook physically on hand to refer to; in fact having existing recipes that you know that people for sure love, is a great pull.
This reason was also why at the very last final runs of putting together the manuscript, I included even MORE recipes! These were all tried-and-true recipes that YOU love.
The final recipes I settled on give a taste of Asia in an achievable way, using versatile ingredients to maintain authenticity and reduce wastage. For example, dry whole spices that work for Malaysian and Chinese Sichuan dishes.
I also try to include as much substitutions for special ingredients wherever I can, because my main hindrance to cooking is thinking I can’t make a delicious dish without a certain ingredient.

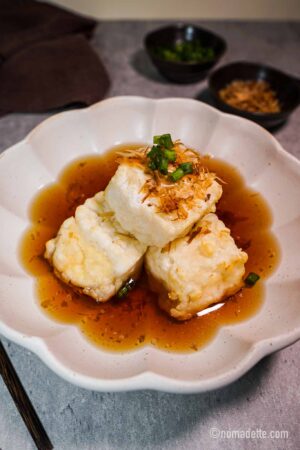
In this research phase, lots of notes were taken, but one thing stood out the most: all of the recipes MUST have a picture! One of my biggest pet peeves whenever I was flipping through any cookbook is when there are no images to accompany the recipes. I don’t know about you, but I want to visualize what my meal is going to look like!
Step 5. Organising a Timeline (the best tools!)
Setting a timeline was crucial to keep the project on track. The Page Street team helped me with this, breaking down the process into manageable chunks and stages: planning, recipe development, writing, photography, and editing. Deadlines may sound stressful, but they help to create structure in the timeline.
While I drafted a manageable schedule, flexibility is the name of the game. Often times I had to switch things around. So many factors came into play – unavailable ingredients, dishes not working out even after multiple tries, my desire to take power naps in the middle of the day (lol), so the timeline is simply a rough guide.
Some tools that have been instrumental in these planning stages are:
Notion
I’ve been using Notion as my main note-taking app for a long time before this cookbook project. It’s free and super popular but Notion can be a bit of a learning curve if you want it to be a fully-functioning organising app that does everything for you… and it can get clunky and messy quick.
I started on Notion as a drafting tool, but I needed a more visual organising app. And that’s where Milanotes come in!
By the way, if you are already using Notion, I have a FREE Notion meal planner just for you! Subscribe to my mailing list to get it!
Milanote
Milanote was my newest organizing tool, perfect for visualizing my recipes. I used it to plan the outline, track ideas, organise research, draft recipes, make notes and manage to-do lists. When it comes to the photography, this app was especially useful during the photography stage!
I used it to create mood boards, plan photo shoots, and organize inspiration images. Milanote’s drag-and-drop interface made it easy to map out the look and feel of each dish, ensuring the visuals matched the book’s aesthetic. I used it to create a comprehensive project plan, track recipe ideas, manage to-do lists, and organize research.
Each recipe had its own page, where I could jot down ingredients, steps, and any changes during testing. The ability to link pages and create a web of interconnected notes was invaluable. It has a free version, but I upgraded to the paid version to get unlimited boards and storage (so many visual references!).
Google Calendar
Google Calendar kept my deadlines in check. I blocked out time for research, recipe development, writing, photography, and editing. By setting reminders and deadlines, I could ensure that I stayed on track. Seeing my progress visually in a calendar view helped me manage my time effectively and avoid last-minute stress.
Apple Notes App
An an Apple iOS user, the Notes app was my go-to for quick ideas and general note-taking! As much as I adore the capabilities of Notion and Milanotes, Notes app is just way more accessible for quick note-taking… especially when there’s slow internet connection or *gasp* no internet (trust that I was working on the book when I was in-flight!)
Its syncing capability across my devices meant I could jot down thoughts on my phone and access them later on my laptop.
Pen and Paper
Sometimes, nothing beats the traditional pen and paper. When I’m recipe testing especially, a notepad and a pen was the quickest and most efficient way of making adjustments.
I’m an aspiring author, how do I publish a cookbook?
I’ve been SO LUCKY to have been approached by Page Street Publishing, but if your dream is to publish a cookbook, there are paths for you no matter where you are in your food content creation journey.
Traditional Publishing:
- Write your Cookbook Proposal. Follow the Steps 1 to 4 above.
- Shortlist publishers to represent you, and start pitching your cookbook. Alternatively, find a literary agent who can start to pitch the cookbook for you.
- Once you secure the publisher, get started on the cookbook! Be clear on the terms; what do you handle, and what does the publisher take charge of? For me, I handled manuscript, photography and marketing. Page Street handles design, distribution, and some marketing too!
Self Publishing:
- Write and design your cookbook to completion. See the rest of my cookbook journey for more detailed information on this. If you are a one-person business, I recommend you outsource jobs like designing, especially if you are not skilled at it (I definitely am not!).
- Publish and market on self publishing platforms! Options include Amazon Kindle Direct Publishing (KDP), IngramSpark, and Blurb. KDP is popular for eBooks and print-on-demand paperbacks, while IngramSpark offers broader distribution channels.
And there you have it – the story of how my cookbook journey began, and the cookbook planning phase in a nutshell. If you think this is a lot, wait till you see the next few phases. Stay tuned for more behind-the-scenes peeks and tasty sneak peeks as we countdown to the official release date. Trust me, you won’t want to miss it!
Pre-Order Your Copy Today!

My cookbook, ‘Effortless Asian Cooking,’ is now available for pre-order! This book is packed with 30-minute recipes for flavorful noodles, rice bowls, stir-fries, curries, and more.
Click here to pre-order your copy today and be one of the first to get your hands on ‘Effortless Asian Cooking’!