

Make this easy Cheesy Rabokki with ramen, tteokbokki, and melted mozzarella. A spicy, comforting Korean one-pan meal ready in minutes.
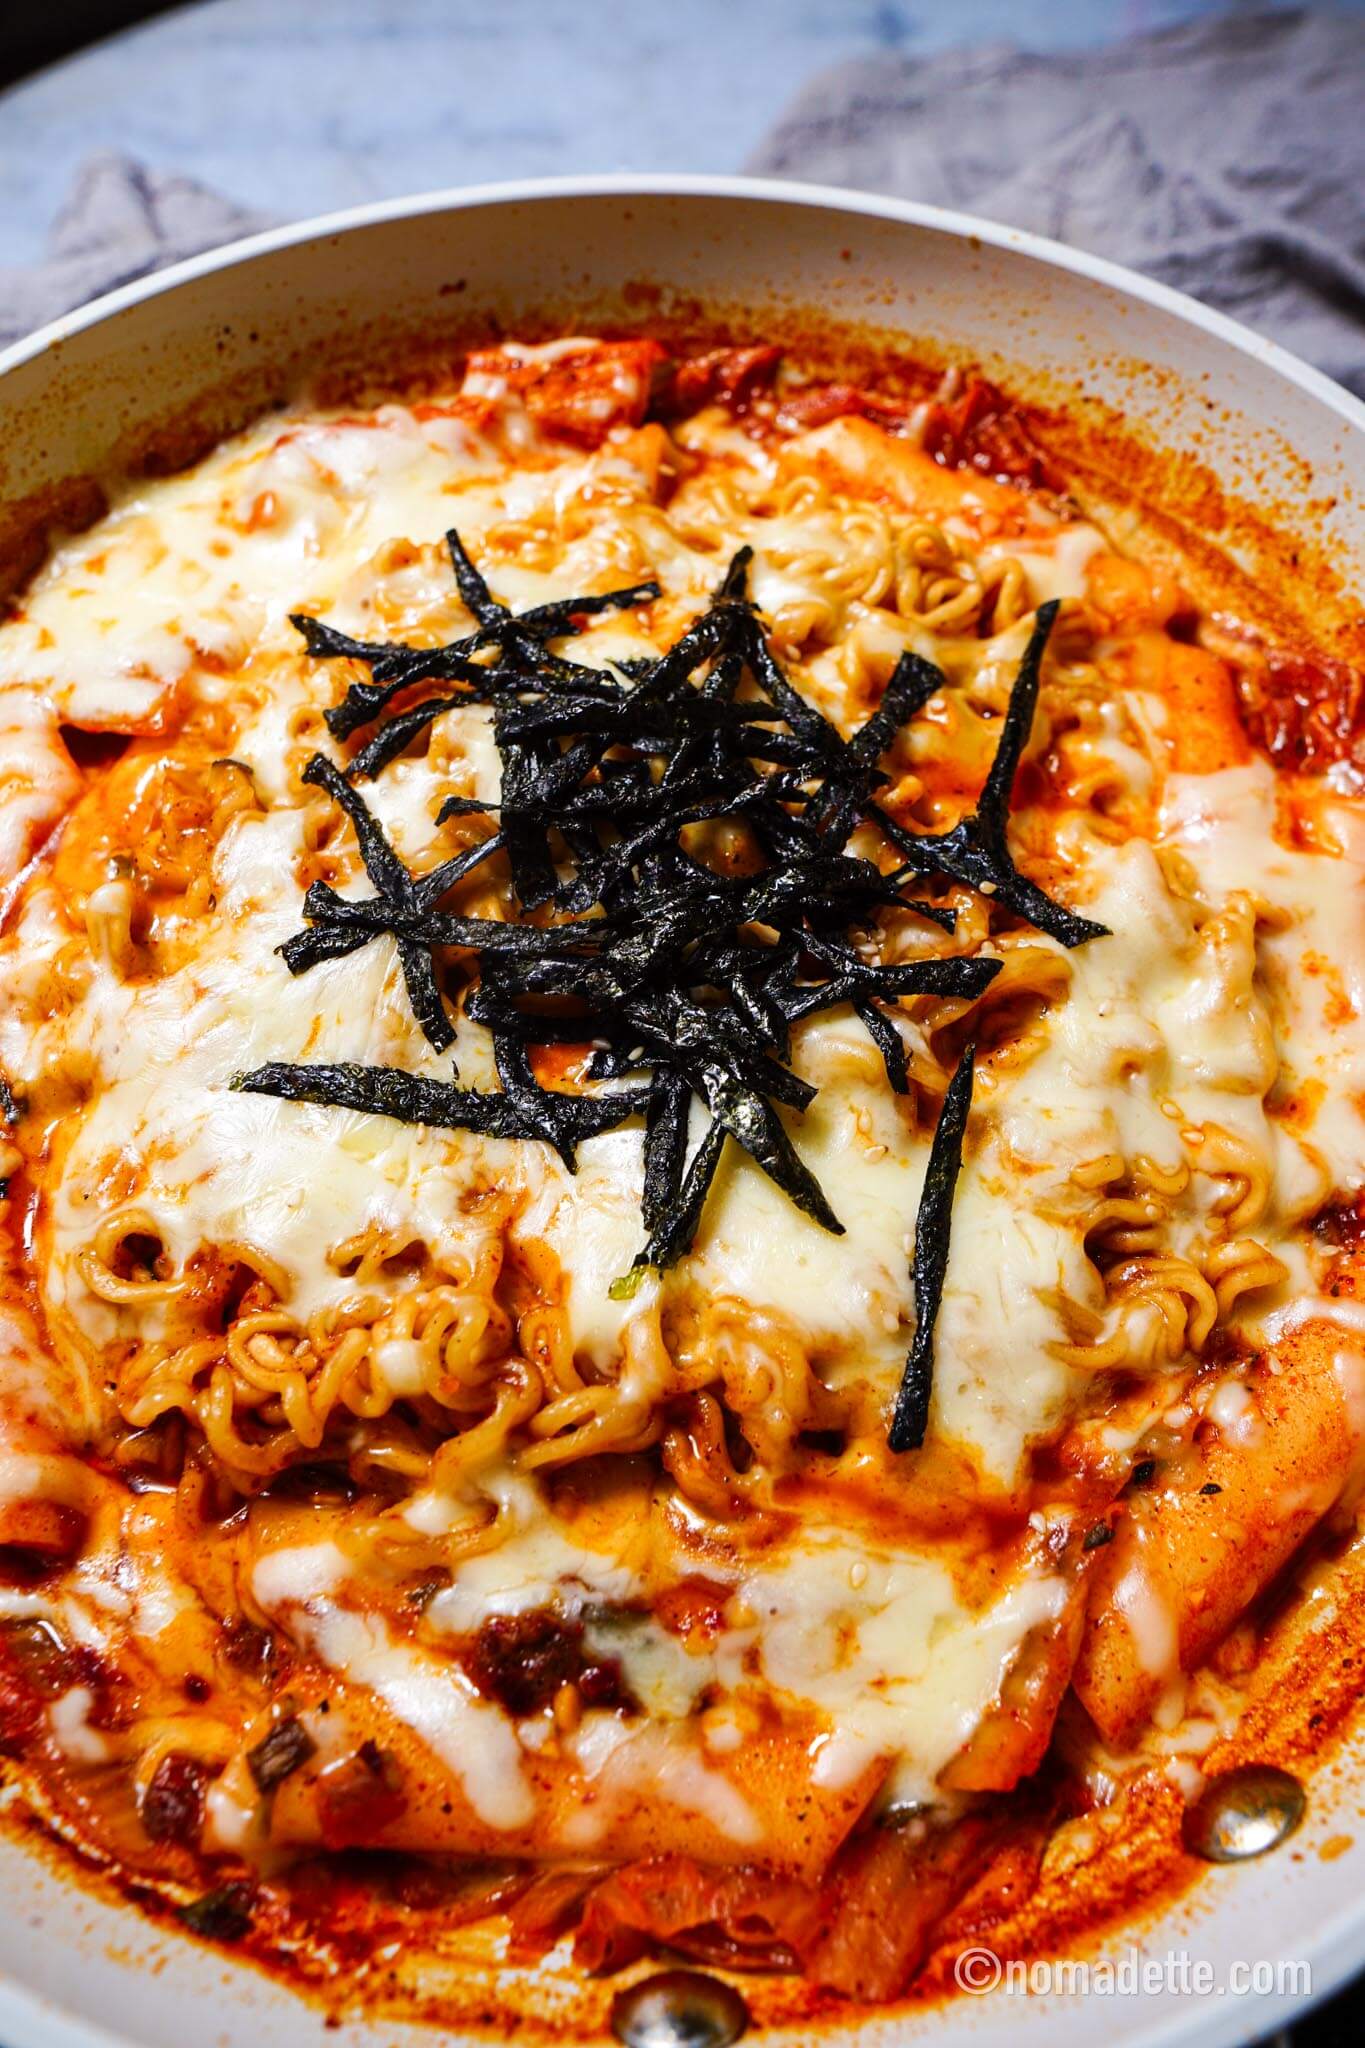
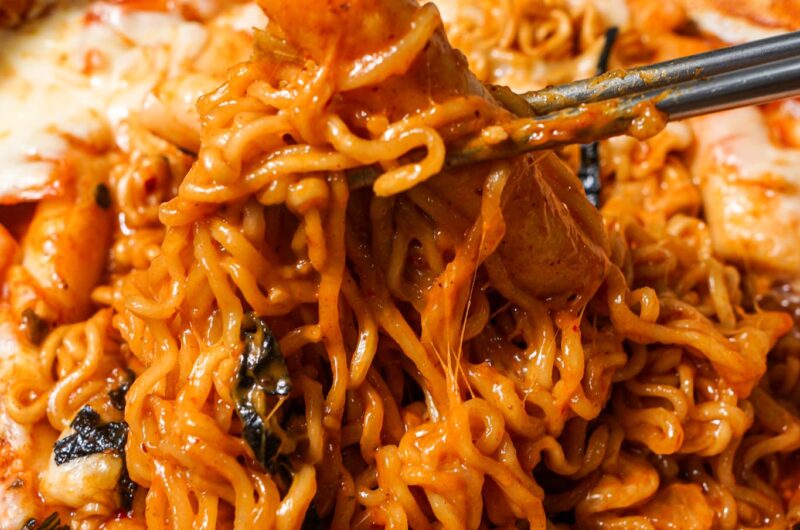
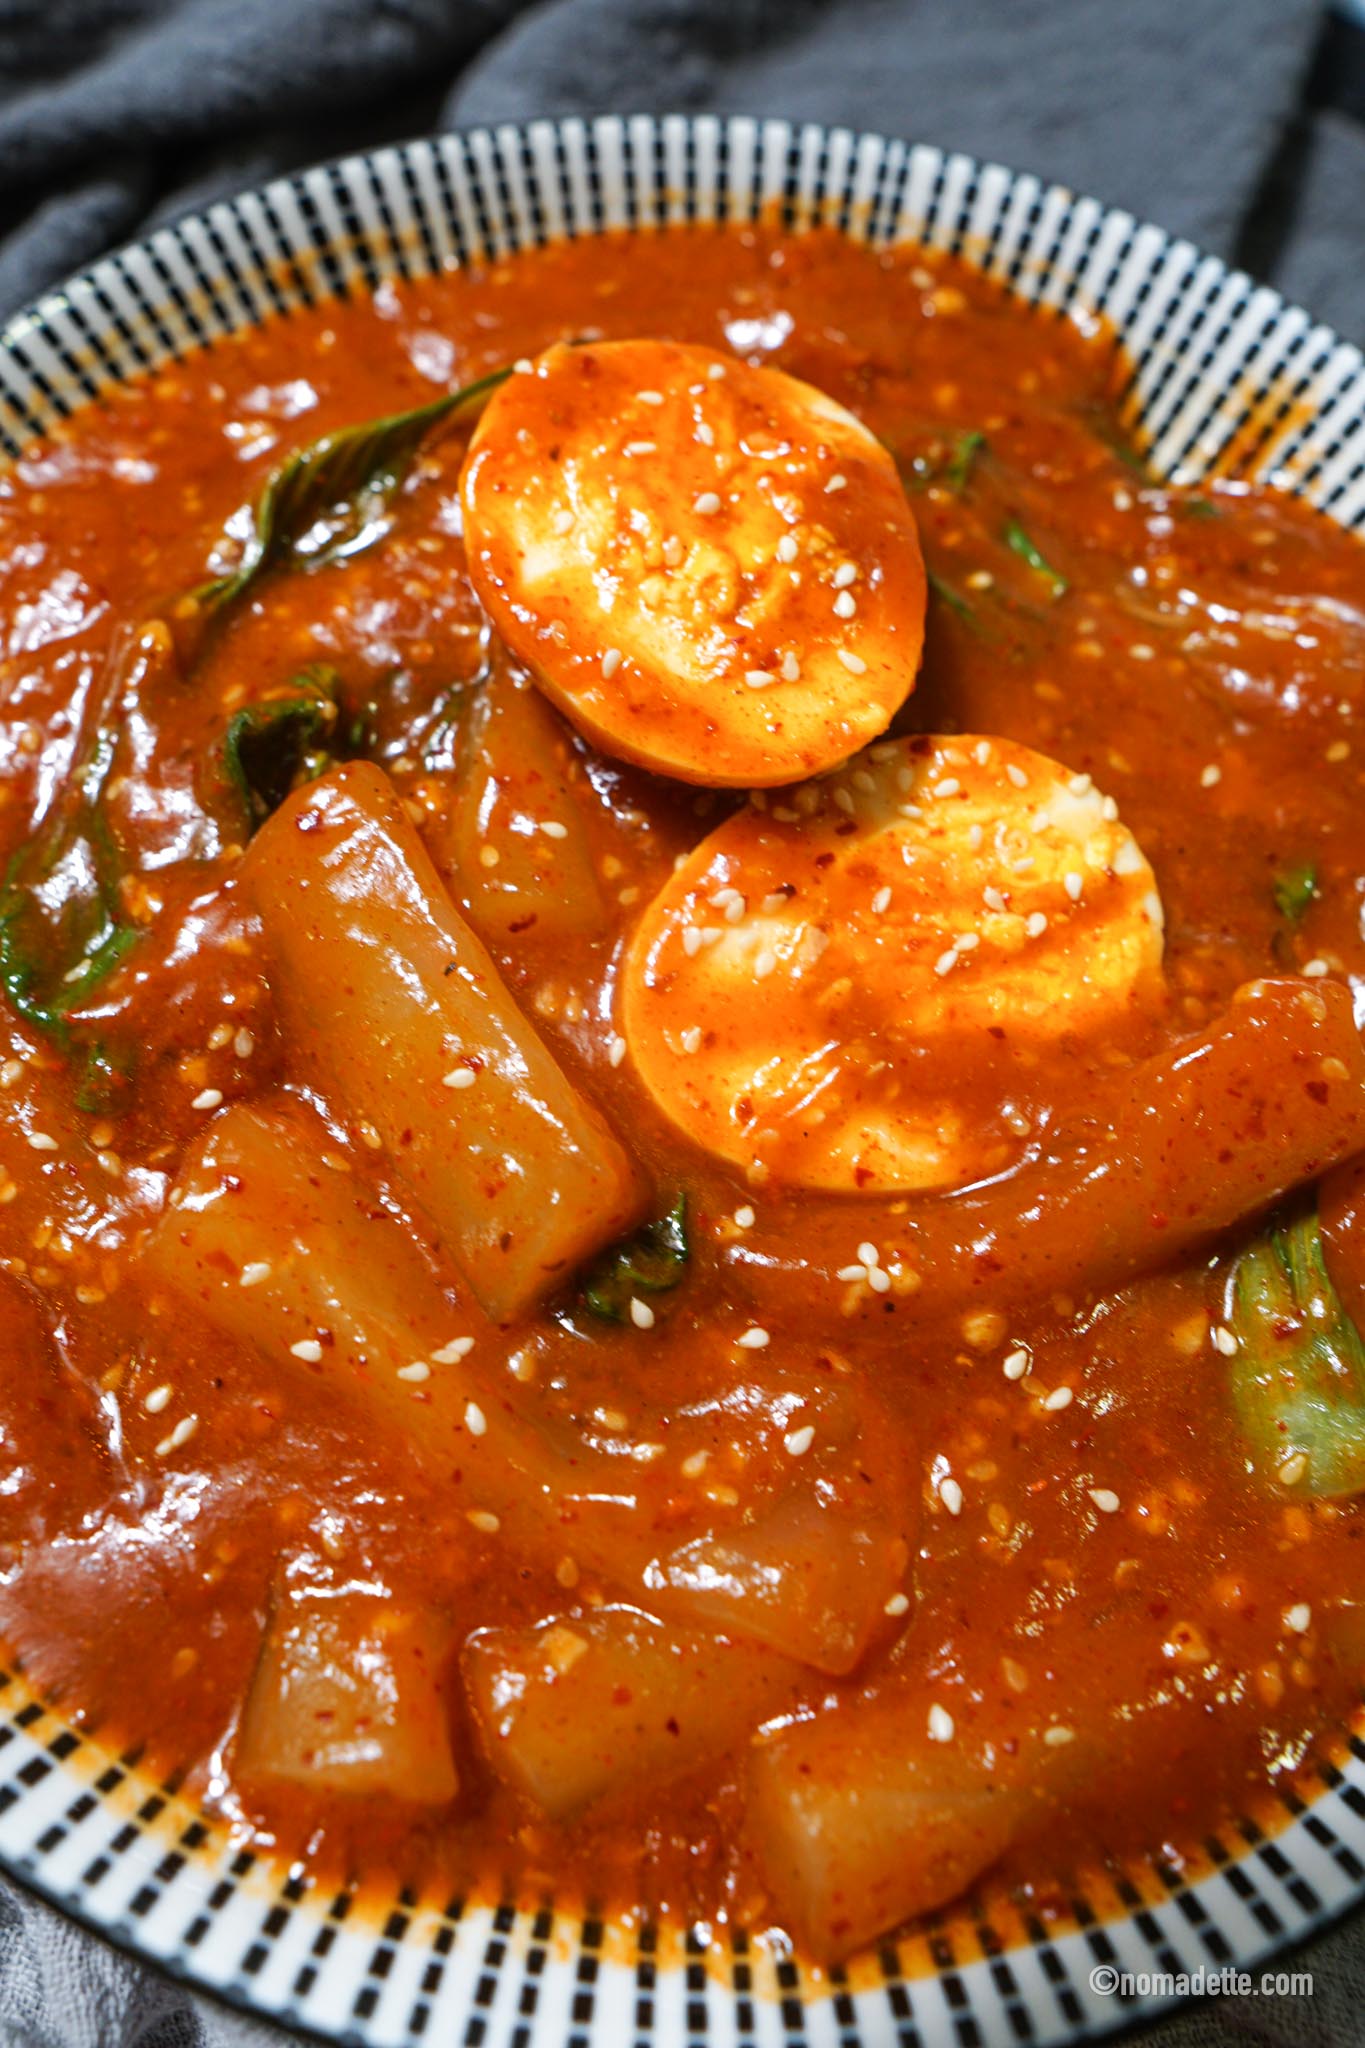
If you love ramen and you love tteokbokki, then it’s time you make this Cheesy Rabokki. It’s got everything: chewy rice cakes, bouncy ramen noodles, a spicy-savoury sauce, and that gooey melted mozzarella right on top.
It’s quick, comforting, and dangerously addictive.
What Do You Need to Make Cheesy Rabokki?
There are really three main ingredients:
- Tteokbokki: I used the classic cylinder ones, but sliced tteokbokki works too. Give them a quick rinse under water before cooking; it helps them soften faster in the sauce.
- Instant Ramen: Use your favourite spicy Korean ramen! I used Nongshim here, you want to use the soupy ramens for Rabokki – we’ll be using the seasoning packet it comes with!
- Cheese: Use whatever cheese you love, but mozzarella is my forever favourite for Korean dishes. The mild, milky flavours just go well with gochjang. Plus – that fun cheese pull!
What’s in the Cheesy Rabokki Sauce

You can just use the ramen seasoning packet and call it a day…
BUT this combo makes it so much better:
- Gochujang (Korean red pepper paste)
- Chili flakes or gochugaru
- Light soy sauce
- Sugar or honey (balances all the heat + savouriness)
- Ramen seasoning packet (extra flavour since we’re just using water here.)
- A splash of water to loosen everything
This gives it that tteokbokki touch. Mix this together and you get a thick, glossy, spicy-savoury sauce that coats everything perfectly.
What To Add to Rabokki (Optional Add-Ins)
I kept mine simple with just ramen, tteokbokki, and LOTS of cheese, but you can pimp it up with your favourite ingredients:
- Korean fish cakes
- Boiled eggs
- Mandu (dumplings)
- Sausages
- Cabbage, carrots, mushrooms
- Extra kimchi
This dish is super flexible — use whatever you’ve got in the fridge.
How to Make the BEST Cheesy Rabokki
1. Stir-Fry the Kimchi (optional but soooo good)
I like to sauté the kimchi first until it gets a little caramelised. It adds a roasty flavour and takes away that sharp sourness. Totally optional, but it makes the whole dish taste deeper.
2. Control the Liquid
I used about 3 cups (720 ml) of water, which gives a thicker, saucier finish. If you prefer something soupy — like classic tteokbokki broth — just add more water. It’s very forgiving.
3. Add the Cheese at the End
Once everything is cooked and the sauce is glossy, add your mozzarella, cover the pan for a minute, and let it melt into the noodles.
How to Serve It
Top it off with your favourite garnishes. I used:
- Thinly sliced nori
- Toasted sesame seeds
Spring onions or extra kimchi also work great!
More Recipes Like This
Cheesy Rabokki | Ramen and Tteokbokki
2
servings5
minutes10
minutesKeep the screen of your device on
Ingredients
1 pack Shin Ramyun (Or any soup instant noodles of choice)
1 cup tteokbokki
2-3 cups water
2 tbsps kimchi
1 clove garlic
1/2 cup shredded mozzarella cheese
- Sauce
1 tbsp gochujang
1 tbsp gochugaru or chilli flakes (adjust according to spice tolerance)
1 tbsp light soy sauce
1 tsp sugar
1 pack instant noodle seasoning
2-3 tbsps water
- Garnish
Nori strips
Sesame Seeds
Spring Onions
Directions
- Combine sauce ingredients in a bowl and set aside.
- In a pan, heat oil over medium heat and stir fry kimchi and garlic until fragrant.
- Pour in water and stir in the sauce. Allow this to come to a boil.
- Add tteokbokki, and let it cook for about 5 mins, or until tteokbokki softens.
- Create a well in the middle, and add instant ramen and the remaining pack of dehydrated vegetables. Let ramen cook till al dente, or for about 4-5 minutes. Toss ramen noodles for even cooking.
- Sprinkle on cheese over the noodles. Option to cover with a lid for quicker melting. Once cheese melts, take it off the heat and add garnishing of choice. Best served immediately!
Did you make this recipe?
Tag @nomadetteats on Instagram
hello!! was wondering about the calories 🙂
Hmm. I don’t know, but probably A LOT. Lol.