
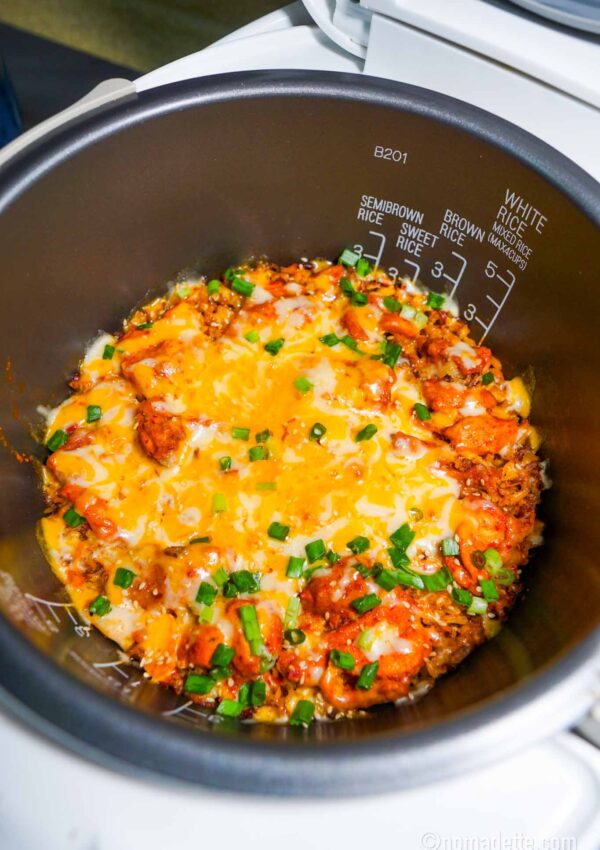
Make the creamiest, easiest one-pot mac and cheese with evaporated milk and a crispy panko topping. No roux, no fuss—just pure comfort food!

Mac and cheese is the ultimate comfort food—rich, creamy, and loaded with cheesy goodness. And this is the only way I’ll make Mac and Cheese – all in one pot!
This is the ultimate lazy one-pot mac and cheese—no extra pots, no draining, and no fussy sauce-making. The macaroni cooks directly in a flavourful mix of milk, stock, and seasonings, absorbing all the creamy richness as it softens. Once the cheese melts in, you get a velvety sauce that clings to every bite.
And for that perfect contrast? We’re finishing it with a golden, buttery panko topping for a bit of crunch.
If you love mac and cheese but hate the extra effort, this is the recipe for you!
Why You’ll Love This Mac and Cheese
✔️ One-Pot Wonder – The pasta and sauce cook together in one pot, meaning less cleanup and less hassle.
✔️ No Roux Needed – Skips the traditional butter-flour-milk base but still turns out just as creamy.
✔️ Evaporated Milk = Game Changer – Richer than regular milk, more budget-friendly than heavy cream, and it won’t split when heated.
✔️ No Mushy Pasta – The key? Turning off the heat just before the macaroni is fully cooked.
✔ Quick & Simple – Minimal prep, maximum comfort!
Key Ingredients

- Macaroni – Classic elbow pasta is the go-to to hold the cheesy sauce well. Any short pasta like cavatappi, shells, or penne will work.
- Onion & Garlic – Sauteed onions and garlic adds depth of flavour! Use my homemade aromatics pastes for convenience. Alternatively, add onion and garlic powder later on.
- Butter or Olive Oil – Use either or!
- Stock (or Water) – Cooking the pasta in stock adds extra flavor.
- Evaporated Milk – Makes the sauce ultra creamy without curdling! This was a tip from one of you, and I’ve not looked back since. Plus it’s cheap here and shelf-stable. You can also use regular milk or heavy cream.
- Cheese Blend – Use your favourite mix, here I’m using a blend of cheddar, mozzarella and Colby. I also added Parmesan – not really for the ‘cheesiness’ but for amazing umami flavour. At the very minimum, I would do a sharp cheddar and parmesan for my Mac and Cheese!
- Chili Flakes (Optional) – A little kick of heat to balance the richness.
- Panko Breadcrumbs – For a crispy golden crust, we’re mixing panko breadcrumbs with melted butter before baking. Regular breadcrumbs work too, but I always only have panko at home.
Key Steps to Making the Best Lazy Mac and Cheese
1. Sauté the Aromatics

- Heat butter or olive oil in a pot over medium heat.
- Add onion and sauté until soft.
- Stir in garlic and cook until fragrant.
2. Cook the Macaroni

- No need to pre-boil the pasta separately! The pasta will soak up all the flavors as it cooks.
- Add uncooked macaroni and stir to coat.
- Pour in stock (or water) and evaporated milk.
- Season with salt and pepper.
- Bring to a gentle boil and cook until al dente. Turn off the heat immediately to prevent overcooking.
- Once the macaroni is just al dente, turn off the heat immediately. The residual heat will continue softening it, preventing an overcooked, mushy texture.
3. Melt the Cheese

- While the pasta is hot, add most of the cheddar, mozzarella and colby. Save about 1/2 cup of cheese – these will used for layering later on.
- Add parmesan and chili flakes (if using).
- Stir until fully melted. The sauce will look slightly soupy—it will thicken as it sits.
- You can serve this immediately – it’s the ultimate comfort food!
4. Assemble in a Casserole

- Preheat oven to 200°C (400°F).
- In a bowl, mix panko breadcrumbs with melted butter.
- Transfer half of the mac and cheese in a casserole.
- Spread the remaining cheese over the top. Add the rest of the mac and cheese over the cheese layer. This makes it ULTRA CHEESY!
- Top with the panko breadcrumbs.
5. Bake Until Golden

- Bake/broil for 8-10 minutes until the top is crispy.
- Serve immediately and enjoy!
Alternatively, air fry in a preheated air fryer for 5 minutes until the top is crispy.
How to Serve
This mac and cheese is perfect on its own, but you can also:
- Pair it with protein – Serve with steak, grilled or rotisserie chicken, or a fried egg on top.
- Add roasted veggies – Up the nutrient quotation with some roasted veggies. TIP: roast the vegetables first, so by the time the mac and cheese is done, the oven is already preheated and ready to go.
- Spice it up – Add chili flakes, smoked paprika, or a drizzle of hot sauce.
It’s a crowd-pleaser for both kids and adults, making it great for family dinners, gatherings, or even meal prep.
Tips & Tricks for the Creamiest Mac and Cheese
- Use evaporated milk – It keeps the sauce silky without needing a roux.
- Turn off the heat early – The pasta will finish cooking in the residual heat, preventing mushiness.
- Stir the cheese in off the heat – This prevents it from becoming grainy or separating.
- Add a little extra liquid – The sauce will thicken as it cools, so keeping it slightly runny at first ensures a creamy consistency.
- ✅ Mix up your cheeses – A blend of melty (mozzarella, Colby) and sharp cheeses (cheddar, Parmesan) gives the best flavor.
Tips for Keeping It Creamy (Not Stodgy!)
- Turn off the heat once pasta is al dente – It will keep absorbing liquid as it sits. You can even cook it 1 minute before al dente!
- Stir cheese in off heat – Prevents it from becoming grainy or clumpy.
- Keep it slightly soupy – The sauce thickens naturally as it cools.
- Do not bake for long – Bake just enough to get a crisp breadcrumb topping. If you have the broil function, use it.
Can This Be Made Ahead?
In my world, this is SO quick and easy to make that it seems… pointless to make ahead. If you want to make ahead anything, perhaps you can pre-chop the onions and garlic (although if you have aromatics paste on hand, there is no need for this step even).
BUT I have made it ahead when I was hosting, and I had a few dishes to prep. So here are my best tips on making ahead mac and cheese without it going stodgy overnight!
Make-Ahead Options
Option 1 (Extra Creamy, More Prep):
This is a bit more extra work, and a bit more ingredients but definitely yield the best results. If you’re serving guests, you want it to be extra good anyway right?
- Cook pasta separately until al dente.
- Let cool and coat with butter, olive oil or neutral-tasting oil. This is the game-changing step to prevent it from soaking up liquid. Butter is my top option, neutral oil second. I like olive oil too, but it will leave a pronounced olive oil flavour – not everyone will like this.
- Make the cheese sauce separately (decrease the water or stock amount).
- Store the pasta and sauce separately in the fridge.
- When ready to serve, reheat the cheese sauce with a splash of water or milk if needed, then stir in the pasta.
- Assemble and bake as usual.
Option 2 (Minimal Prep, Slightly Less Creamy):
- Make the one pot mac and cheese as usual, but don’t top with breadcrumbs, and don’t bake yet.
- Let it cool, then store in the fridge for up to 2 days.
- Before serving, add a splash of milk, and stir through gently.
- Top with breadcrumbs and then bake as instructed.
Storing & Reheating Instructions
Storing
- Fridge – Store in an airtight container for up to 3 days.
- Freezer – Mac and cheese without breadcrumbs can be frozen for up to 2 months. Thaw overnight in the fridge before reheating.
Reheating
- Stovetop – Add a splash of milk, reheat over low heat, and stir gently until creamy again.
- Microwave – Heat in short 30-second bursts, stirring in between. Add a little milk if needed.
- Oven – Cover with foil and bake at 350°F (175°C) for about 15 minutes.
This lazy mac and cheese proves that you don’t need fancy techniques to get a rich, creamy, and ultra-cheesy dish. Whether you’re making it for a cozy weeknight meal or prepping it ahead for later, it’s guaranteed to hit the spot.

Baked One-Pot Mac and Cheese
4
servings5
minutes25
minutesIngredients
- For the Mac and Cheese:
2 tbsp butter or olive oil
1 large onion, finely chopped
6 cloves garlic, minced
2 cups (200g) elbow macaroni
2 cups (480ml) chicken or vegetable stock (or water)
1 cup (240ml) evaporated milk (or regular milk or heavy cream)
2 tsps salt (adjust to taste)
½ tsp black pepper
1 tsp chili flakes (optional and adjust to taste)
2 cups (200g) cheddar, mozzarella, and Colby cheese blend, grated
¼ cup (25g) Parmesan cheese, grated
- For the Crispy Panko Topping:
½ cup panko breadcrumbs
1 tbsp butter, melted
Directions
- Sauté the Aromatics:
- Heat butter or olive oil in a large pot over medium heat.
- Add onion and sauté for 2-3 minutes until soft and translucent.
- Stir in garlic and cook for another 30 seconds until fragrant.
- Cook the Macaroni in One Pot:
- Add uncooked macaroni to the pot and stir to coat with the butter and aromatics.
- Pour in stock (or water) and evaporated milk.
- Season with salt and black pepper. Stir well.
- Stir well and bring the mixture to a gentle boil.
- Simmer Until Al Dente:
- Let the mixture come up to a gentle boil and let the macaroni cook. Stir occasionally, for 7-8 minutes or until just al dente.
- Turn off the heat immediately to prevent overcooking—the pasta will continue cooking in the residual heat.
- Stir in the Cheese:
- While the pasta is still hot, add most of the cheddar, mozzarella and Colby, leaving about 1/2 a cup aside.
- Add Parmesan and chili flakes (if using).
- Stir until the cheese melts and the sauce becomes creamy.
- The mixture may look slightly soupy – this is perfect! It will thicken as it cools.
- Prepare the Crispy Panko Topping:
- Preheat the oven to 200°C (400°F).
- In a small bowl, mix panko breadcrumbs with the melted butter until evenly coated.
- Bake Until Golden:
- Transfer half of the mac and cheese to an oven-safe casserole dish. Evenly sprinkle the remaining 1/2 cup of cheese over the mac and cheese layer.
- Layer on the rest of the mac and cheese over the cheese layer.
- Evenly sprinkle the buttery panko topping over the surface.
- Bake or broil for 8-10 minutes, or until the topping is golden brown and crispy.
- To Air Fry:
- Air fry at 200°C (400°F) for 5 minutes, or until the top is crisp.
- Serve and Enjoy!
- Option to garnish with finely chopped parsley or basil.
- Spoon mac and cheese into serving plates. Serve immediately and enjoy!
Did you make this recipe?
Tag @nomadetteats on Instagram


Leave a Reply