
Easy homemade peri peri sauce that’s smoky, spicy and tangy! Roasted or made in the air fryer for maximum flavour with minimal effort.
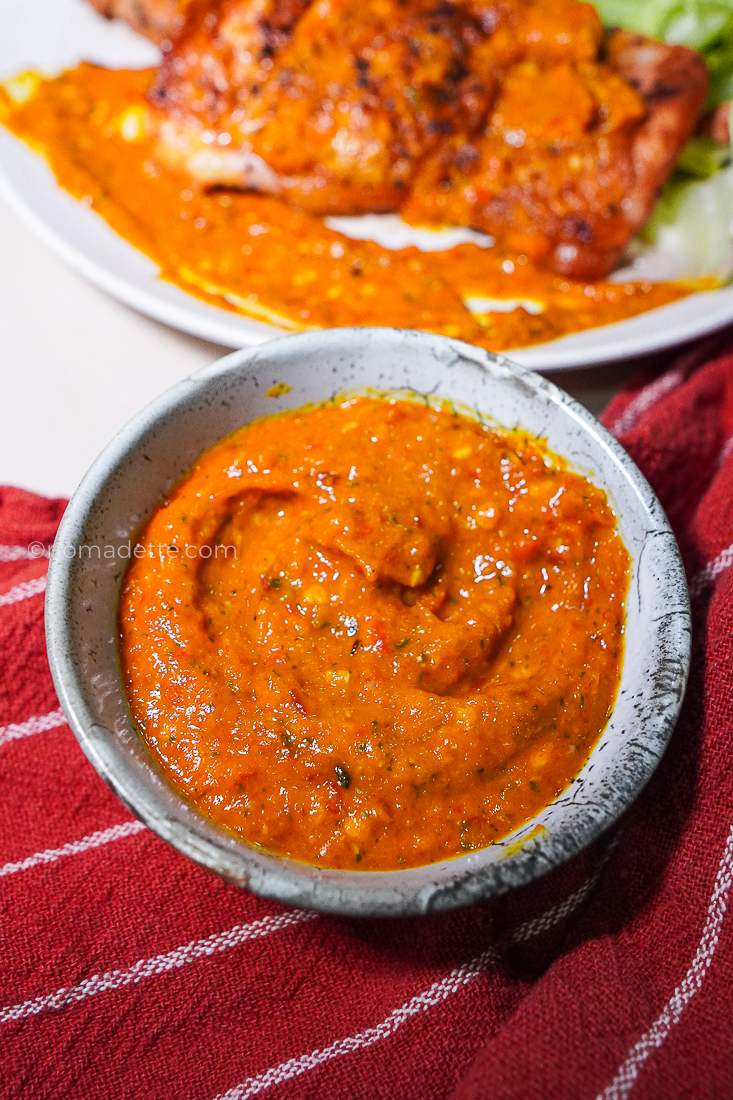
My favourite sauce to serve with pretty much any kind of chicken is my homemade peri peri sauce. I always have capsicums in my fridge, and when I don’t know what else to do with them, they become this sauce.
Sauces have also been lifesavers in helping me eat healthier at home. I recently received a bottle of peri peri sauce that was marketed as a “healthy” no-sugar sauce. I flipped it over to read the ingredients list, saw ingredients I couldn’t pronounce, “natural flavouring”, “colouring”… and tossed it.
Homemade peri peri sauce is easy to make and inherently healthy. Once you’ve made it from scratch, it’s hard to go back to store-bought. My recipe is smoky, spicy, aromatic, and with the right tang to whet appetites… even if you made the most basic chicken, this will make it infinitely more delicious.
The first time I made it, I blended the fresh ingredients together and cooked it over the stove. It was good, but my memories of peri peri sauce were always of it being served with grilled chicken… and I wanted that smoky element even without the grilled chicken! So I roasted the chillies first, and we’ve got it! Letting the spices and herbs cook in the oil first also helped deepened the flavour.
It’s not only good with chicken, it’s great with seafood, as a sauce, over rice bowls or stirred into pastas! This is the kind of sauce you want sitting in your fridge.
What is Peri Peri Sauce?
My first taste of peri peri was at Nando’s! Peri peri (also spelled piri piri) sauce is a spicy chilli sauce with Portuguese and African roots. It’s bright, tangy, spicy, with a mellow sweetness all at one.
There are countless variations around the world, but the beauty of making it at home is that you can easily customise the spice level, acidity and consistency to suit your own taste.
Why You’ll Love This Recipe
Key Ingredients
- Capsicums/Bell pepper: Adds natural sweetness and gives the sauce body without needing lots of oil! We don’t need added sugar because of this.
- Red chillies and bird’s eye chillies: The combination provides both flavour and heat. Add more or less depending on your spice tolerance.
- Garlic and onion: Air Frying/roasting mellows their sharpness while adding sweetness and depth.
- Smoked paprika: Provides the signature smoky flavour. Optional, but I also like to add ground cumin.
- Dried oregano: A classic herb that complements the citrus and chillies beautifully; though sometimes I use other types of herbs. I’ve used dried rosemary, thyme, basil, and even mixed Italian herbs; they all work beautifully to add subtle depth and aroma to the sauce.
- Olive Oil: This will help the vegetables char beautifully while blooming the spices and herbs. I like to use a healthier fat, but feel free to replace with any other oil including neutral oil.
- Lemon juice and vinegar: These bring brightness and tang while helping preserve the sauce! Any vinegar works, but I love apple cider vinegar for this.
Now if you do want it sweeter, feel free to add honey or sugar… but in my opinion, you really don’t need it!
Key Steps
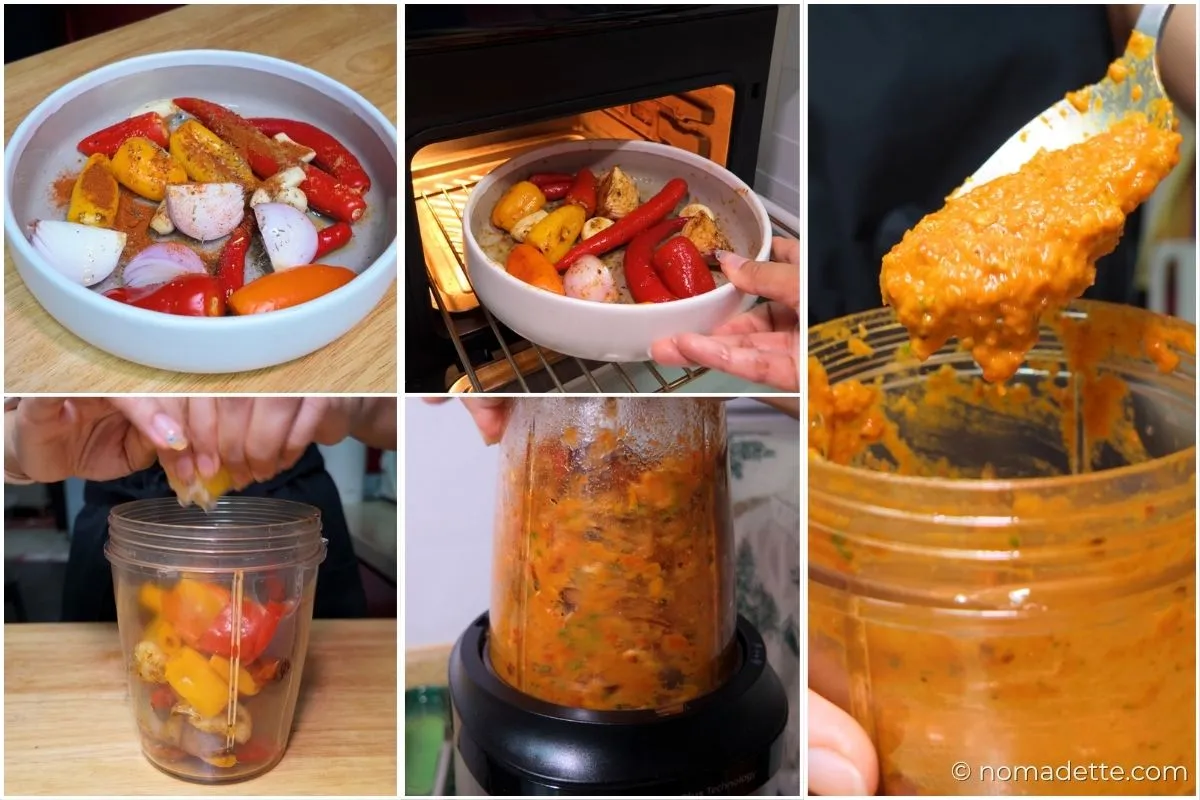
1. Coat Ingredients
- Add the bell pepper, red chillies, bird’s eye chillies, onion and garlic to an air fryer basket or tray.
- Drizzle with the olive oil, then season with the salt, black pepper, smoked paprika, oregano and cumin (if using).
- Toss well to coat.
2. Roast or Air Fry
- Roast or air fry until the vegetables are tender and charred.
- Air Fryer (my preferred method!): Air fry at 180°C (355°F) for 10 minutes, or until the vegetables are tender and lightly charred.
- Oven: Roast at 200°C (400°F) for 20 minutes, turning halfway, until the vegetables are tender and lightly charred.
3. Blend!
- While the vegetables are still warm, transfer everything to a blender.
- Add the lemon juice, vinegar, honey and a splash of water.
- If I have cilantro, I’d add it in too, but optional.
- Blend until smooth!
- Add water bit by bit, if you’d like a thinner consistency.
- Taste and adjust the seasoning with more salt, vinegar or honey (or sugar), if needed.
How to Serve
This sauce is incredibly versatile and works with almost anything, but I especially love it with chicken, here are some easy ways to cook chicken:
- Air Fryer Roast Chicken (Guaranteed Juicy Every Time — Thanks to Brine!)
- How to Cold Sear Chicken Thighs (The Crispiest Skin With No Oil!)
- Chicken Chop
- Easy Chicken Shawarma (Oven, Air Fryer & Stovetop)
It’s also great with:
- Serve with grilled, roasted, air fried, pan-fried steak or fish!
- Besides serving with, you can even marinate chicken with this sauce, before grilling or roasting.
- Drizzle or tossed into veggies to make them less boring! Salad works, but it’s extra yummy with roasted vegetables.
- Stirred into pastas, either as a final touch to level up your tomato-based sauces, or toss pasta through this sauce for a punchy dish!
- As a spread inside burgers, wraps or sandwiches.
- Serve as a dipping sauce for your snacks: fries, nuggets or wedges.
Tips and Tricks
Storage and Reheating
Storage
- Store the peri peri sauce in a clean, airtight glass jar in the refrigerator for up to one week.
- For longer storage, freeze it in small portions or ice cube trays for up to three months. Simply thaw overnight in the refrigerator before using. Option to quickly reheat in the microwave or over the stove.
Reheating
- Since this is a condiment rather than a cooked dish, there’s no need to reheat it. If you’d like a warm sauce, you can reheat in the microwave.
- If using it as a cooking sauce or marinade, simply brush or stir it into your food before cooking.
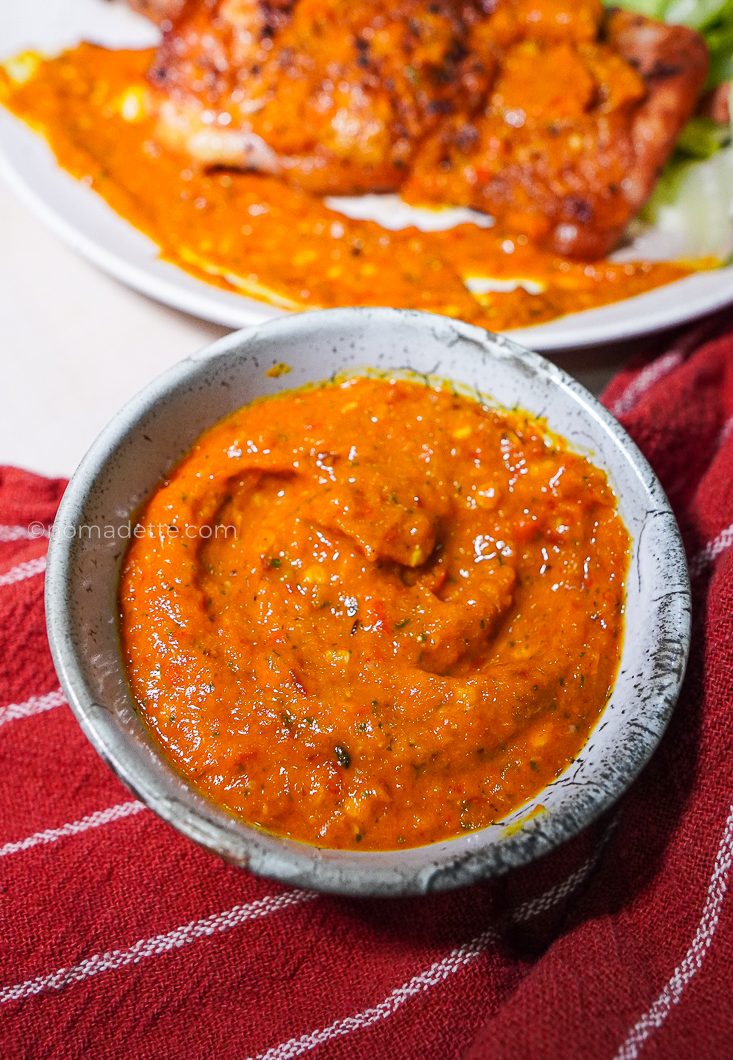
Homemade Peri-Peri Sauce
4
servings5
minutes10
minutesEasy homemade peri peri sauce that’s smoky, spicy and tangy! Roasted or made in the air fryer for maximum flavour with minimal effort.
Keep the screen of your device on
Ingredients
- To Roast/Air Fry
1 bell pepper (capsicum)
2 red chillies
2 bird’s eye chillies (adjust to spice tolerance)
1 onion, peeled and quartered
5 garlic cloves
1 tbsp (15 ml) olive oil
1/2 tsp salt
1/2 tsp ground black pepper
1 tsp smoked paprika
1/2 tsp dried oregano
1/2 tsp ground cumin (optional)
- To Blend With
2 tbsp (30 ml) lemon juice
1 tbsp (15 ml) vinegar
2 –3 tbsp (30–45 ml) water
1 tsp honey (optional)
1 -2 stalks cilantro (optional)
Directions
- Preheat the oven or air fryer.
- Add the bell pepper, red chillies, bird’s eye chillies, onion and garlic to a bowl. Drizzle with the olive oil, then season with the salt, black pepper, smoked paprika, oregano and cumin (if using). Toss well to coat.
- Roast or air fry until the vegetables are tender and charred.
Air Fryer: Air fry at 180°C (355°F) for 10 minutes, or until the vegetables are tender and lightly charred.
Oven: Roast at 200°C (400°F) for 20 minutes, turning halfway, until the vegetables are tender and lightly charred. - While the vegetables are still warm, transfer everything to a blender. Add the lemon juice, vinegar, honey (or sugar) and 2 tablespoons (30 ml) water. Blend until smooth.
- Add more water, 1 tablespoon (15 ml) at a time, if you’d like a thinner consistency.
- Taste and adjust the seasoning with more salt, vinegar or honey (or sugar), if needed.
Notes
- Makes: About 1 cup (240 ml)
- Storage: Store in an airtight jar in the refrigerator for up to 1 week, or freeze for up to 3 months. Give it a good stir before using if it separates slightly.
Did you make this recipe?
Tag @nomadetteats on Instagram